How to Make a DIY Calendar

Benjamin Franklin once said that failing to plan is a plan to fail. Our brains can hold so much information thus it is important that we devise a system so that we don’t forget the important dates and special events. As soon as something comes up, it is advisable to add the event to your planner or calendar. There are many organization software programs that help you organize and plan; but one of the reasons people are shifting to bullet journaling is because everyone's plan and schedule is different. By making a DIY calendar you can design a personalized calendar that will work for you.
In this OneHowTo article we share a few ideas on how to make a DIY calendar.
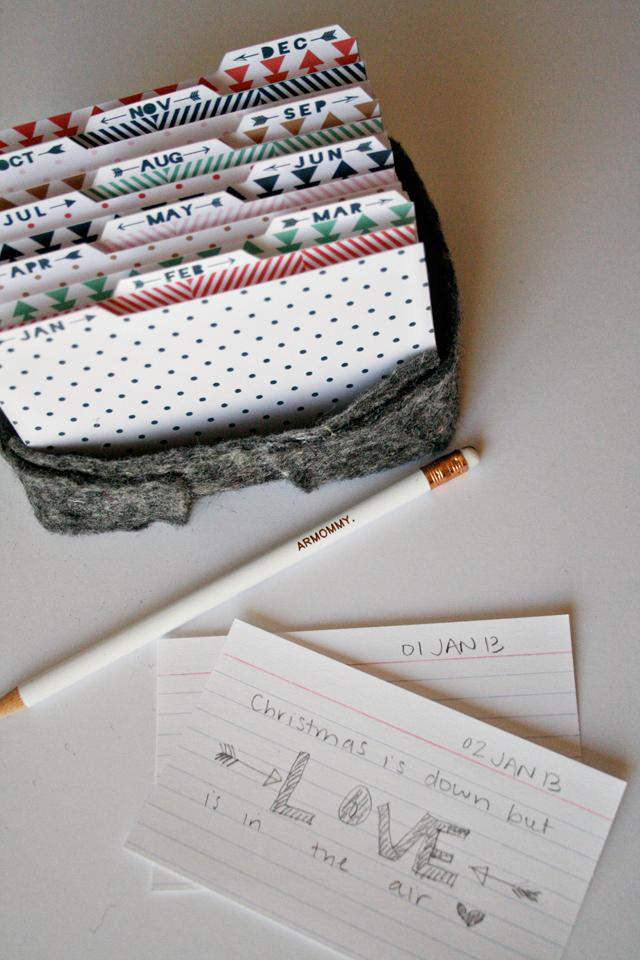
Card file box calendar
Folder and file boxes are a must in an office space to keep loose papers and documents organized. You may remember from a few years ago, how librarians would store the book cards from the items you borrowed on small card file boxes. Today, you can barely find these organization and filing systems; but they are a perfect solution for a creative DIY calendar.
Initially you will need:
- A card file box or shoebox
- Lined card index cards
- Different colored thick cardboard
- Stickers and washi tape (optional)
First, make sure that your index cards fit comfortably inside your box. If they are too large cut them in half. Then cut twelve different colored cardboard pieces for every month of the year, these should be a little bit larger than the index cards so that they rise up from above. Then name each card as a month and place them inside your box. The idea is to add your important events and dates onto an index card and file it inside the box within the corresponding month section. When a new month starts just take out your cards and plan accordingly.

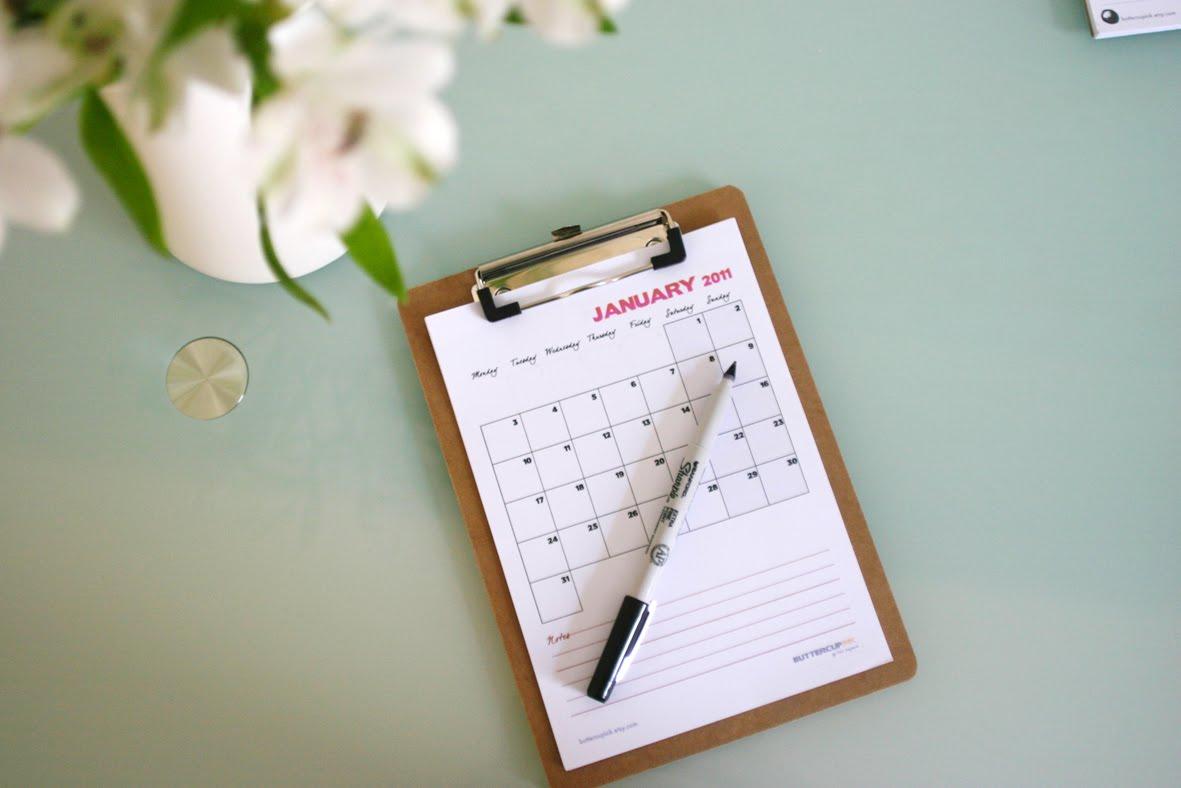
Clipboard calendar
If your job requires you to walk around from place to place in a frantic manner, you most likely would want to carry around a notebook or a handheld device to accompany your brain. Many people carry iPads or similar tablets nowadays; but these are fragile, bulky and you wouldn’t want risking misplacing it or loosing it.
Back in the days, people carried clipboards. They would clip documents on them, then grab a pen and head out to work. Creating a DIY clipboard calendar is an easy way to always have a calendar on hand. You can draw your own on a piece of paper or print one from the Internet. Then clip it first to your clipboard so when you want to check your schedule, you just have to flip over to the last page of your clipboard where you fill find your calendar.

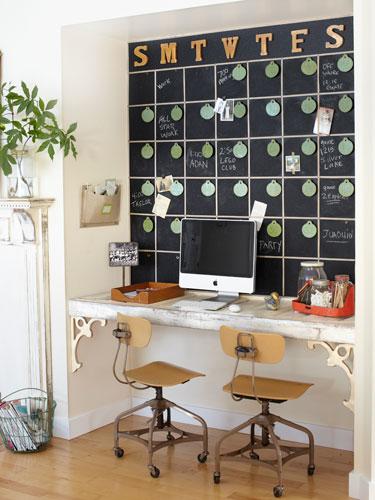
Blackboard or whiteboard wall calendar
If you enjoyed drawing and painting on the wall as a child, know that you can bring back your childhood creative abilities safely by creating a blackboard or whiteboard wall calendar.
At many craft stores you should be able to find different blackboards or whiteboards of varying sizes. Measure your wall’s length and buy one accordingly. Then using chalk or non-permanent markers start drawing the structure of your weekly, monthly or yearly calendar. This is a great way to make a visual plan of your meals for the week. You will most likely save time trying to open your phone's app or having to flip through your planner when your wall becomes your calendar.

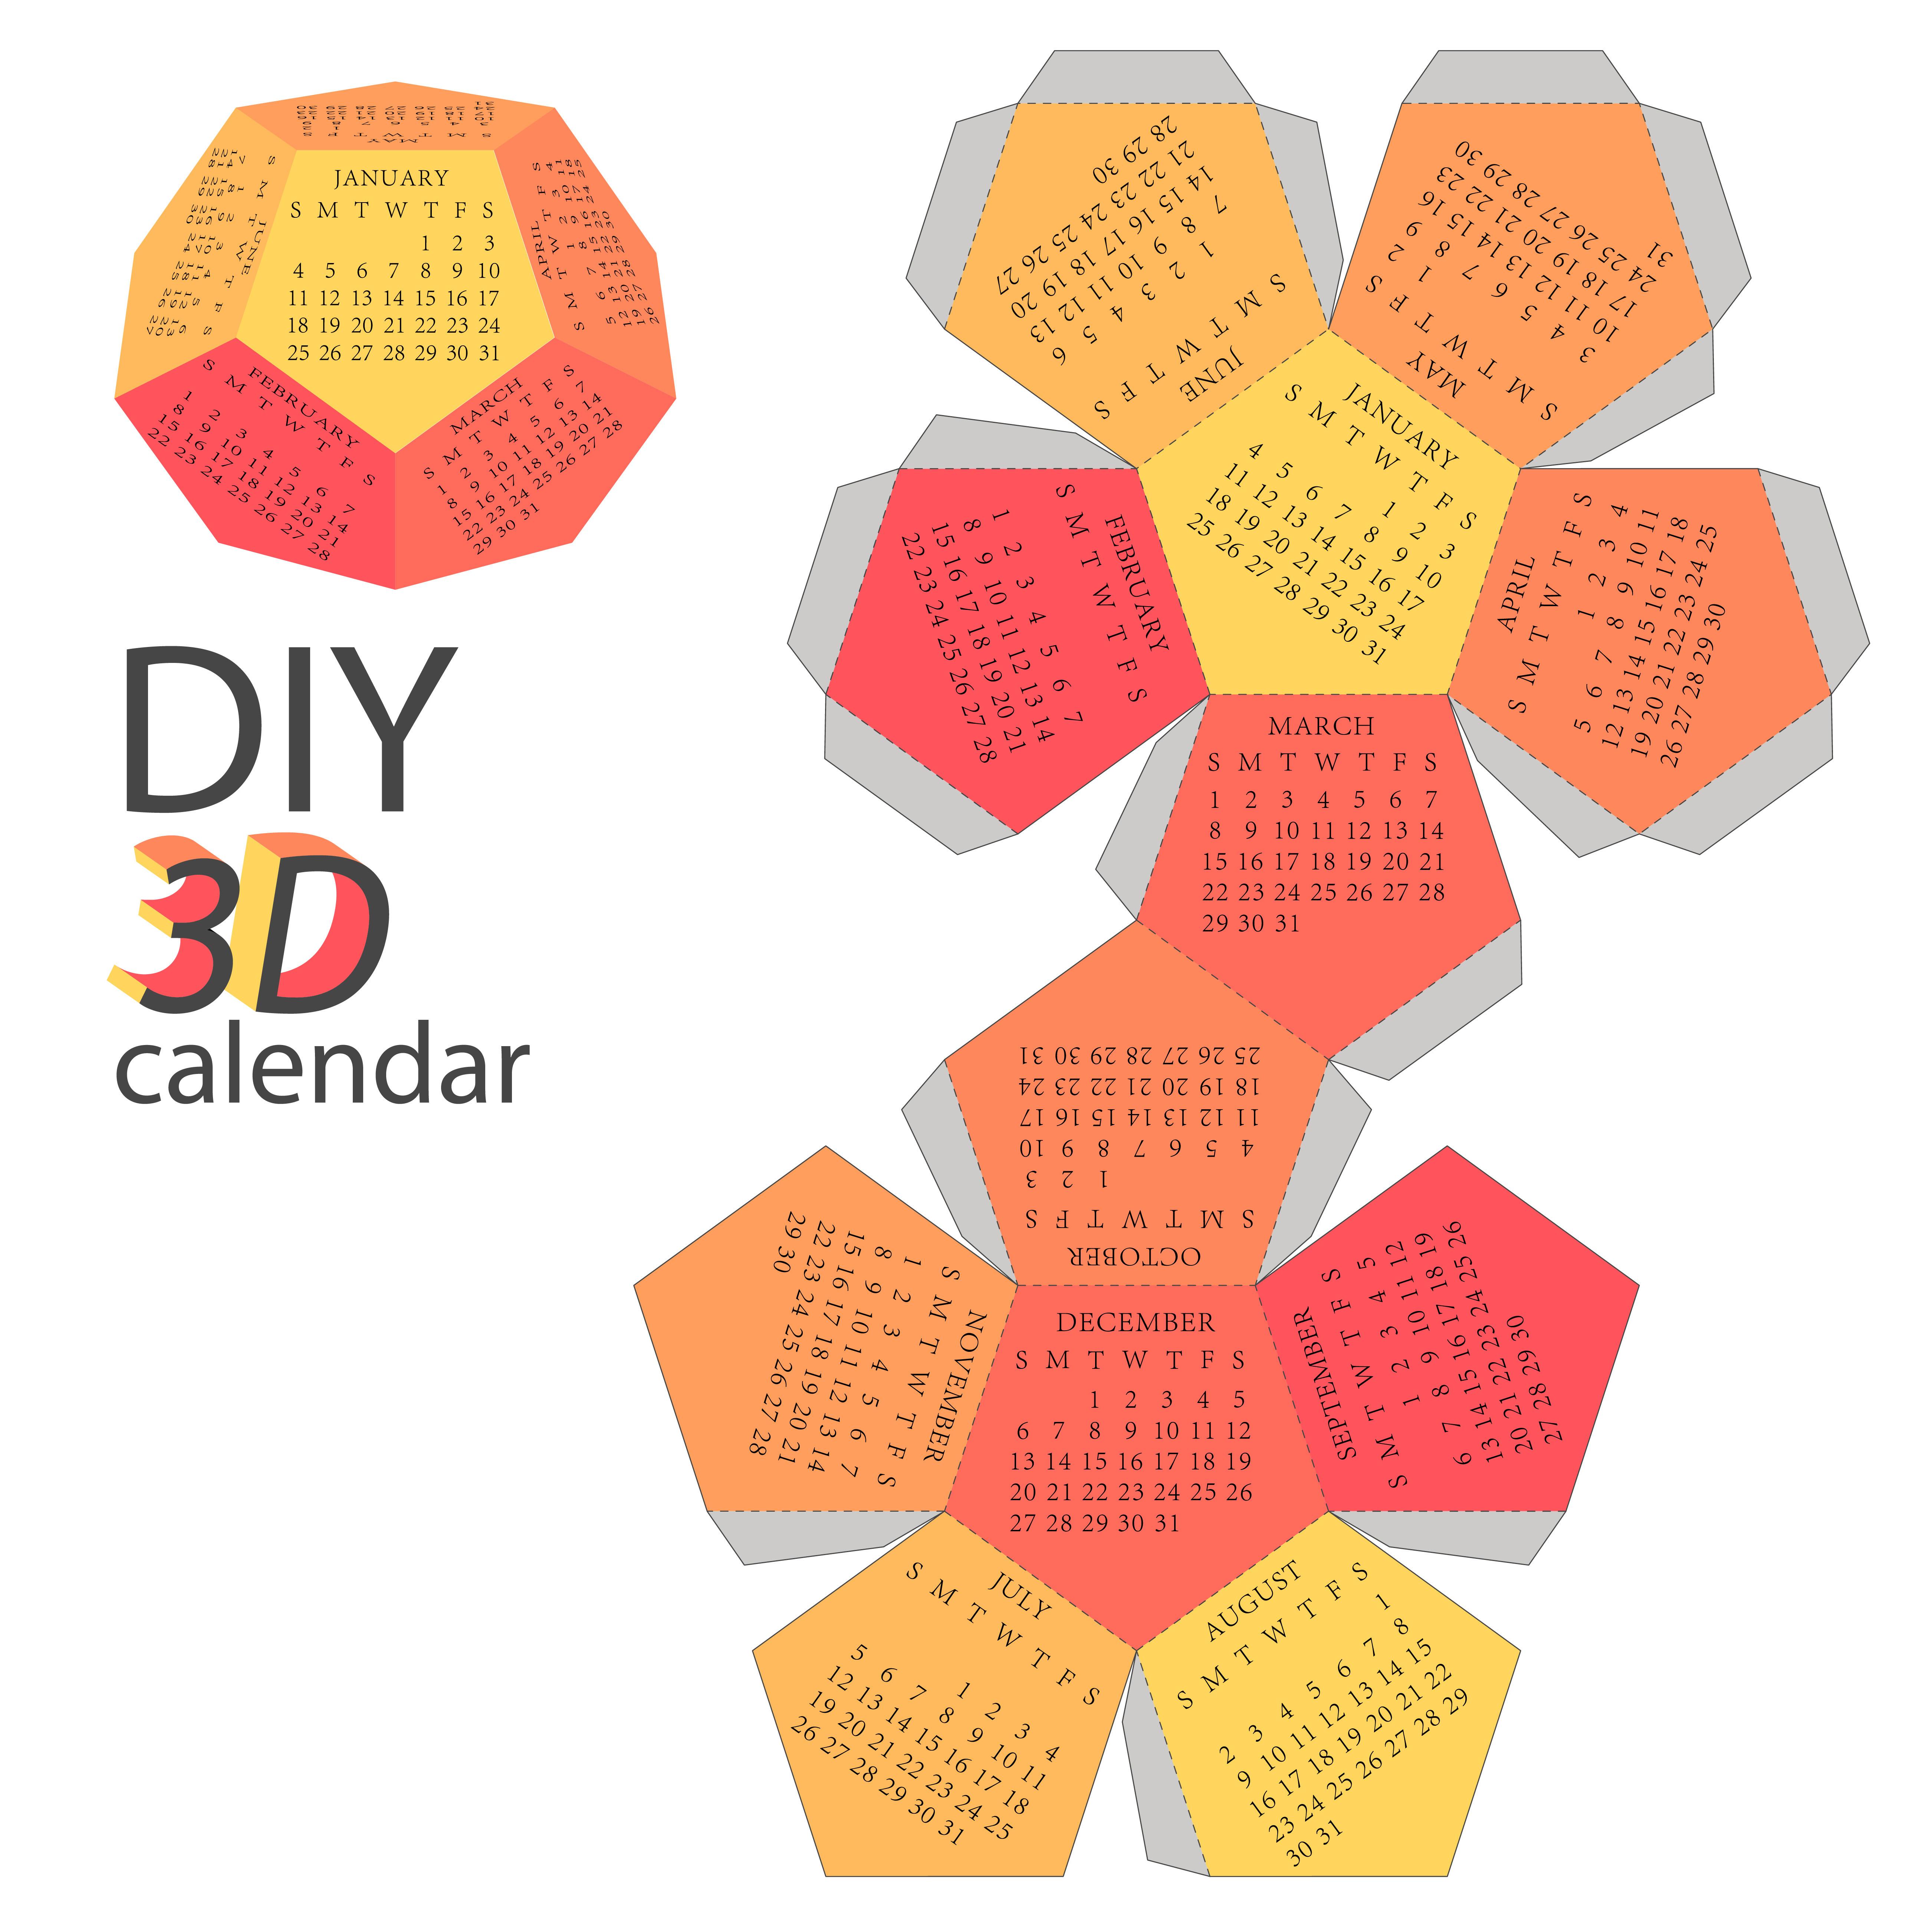
3D calendar
If you're more of an origami fan, you can also make a dodecaethron 3D piece. Made out of twelve pentagon sides, this is a great idea to add to your office and will look amazingly original. Copy our template or create your very own.
In this case, you'll need:
- Cardboard
- Scissors
- Pencil
- Felt pens or pens
- Glue
The first step is to print out the template, cut it out and trace it with a pencil on the cardboard, flaps included. This is the easiest way, though if you prefer it in a different size you can follow different measurements. Cut out the cardboard and fold the flaps on the line you previously marked. Use felt pens, or pens to create each month of your calendar. Glue the bits together to form the 3D shape and your done!

If you want to read similar articles to How to Make a DIY Calendar, we recommend you visit our Art & handicraft category.


