The international logo for recycling has 3 arrows, each one pointing back at each other. The three arrows stand for the 3 "R"s - Reduce, Reuse, Recycle. The importance of this cannot be underestimated, but it can sometimes feel oppressive. It is often much easier to throw things away. However, here at oneHOWTO we're going to show you a way to reuse waste material which is fun, practical and, in it's own way, beautiful. We'll provide a step-by-step guide on how to make a vase using a plastic bottle with a picture for each step so you know exactly what you're doing. Used from every-day-use plastic bottles, this vase is great if you just want to have them round the home, but can also be a cheap and effective way to decorate for a big party or reception.
- 1 Plastic soda bottle with straight sides
- 1 Pair of scissors
There isn't really a limit on the size of the bottle you wish to use. However, there is one important element. It needs to have a section with straight sides and this section should be around a third of the size of the total bottle. If the sides aren't straight, then you won't be able to fold them over very easily. Wash the bottle before you start to make your vase using a plastic bottle.
You'll need to mark and cut this part in the middle of the bottle with smooth sides. It should be about 3¼"/8 cm above the grooved edge on the bottom.

We need to cut strips down these straight smooth sides. They will need to be spaced evenly around the edge to get best results. To do this, you can mark the sections using a ruler. Cut out larger sections which you can divide afterwards rather than trying to cut individual strips all the way around.
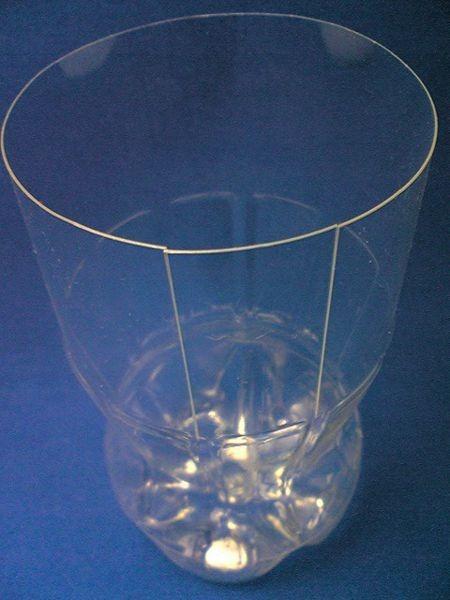
In the picture below you will see we have cut out a wide strip which is the width of 4 individual strips.

To continue making your vase using a plastic bottle, cut the larger segment into the 4 smaller strips.

Continue this process until you have gone all the way around the edge of the plastic bottle. You will see the individual strips are able to be fanned out.

To fan out the strips for our plastic bottle vase properly, turn it upside down and press it against a flat surface. The individual strips will fan out to make a circle. Fold the strips back so that they touch the side of the bottle and create a definite fold.

Now we need to weave the strips from our plastic bottle to make the edge of the vase. Take the first strip and fold it over the next 2 strips, but fold it under the 3rd. In this way, we will be able to tuck the strips into each other. Once it is in the right position, press down the fold tightly so that it remains in place.

Continue this process by folding down the next one in the same direction, folding it over the next 2 and tucking it under the 3rd. Again, press down to keep it in position.

Continue this process of folding, tucking and pressing until all of the strips are closed over. It is important that the angle at which you fold all the strips is the same so that you can get a uniform patter for your plastic bottle vase.

Finish by once again pressing down on all of the folds so that they are as secure as possible. And there you have it; a cheap, durable and pretty vase which works just as well for flowers in your living room as it does as a disposable decoration for a party.

If you liked making this vase using a plastic bottle, at oneHOWTO we offer you other DIY activities you'll really enjoy making:
- How to make candles from crayons
- How to make a butterfly out of aluminum cans
- How to make God's eye craft with Popsicle sticks
If you want to read similar articles to How To Make A Vase Using A Plastic Bottle, we recommend you visit our Art & handicraft category.