Many of us have tried clay modelling at some point in our lives, although less of us have finished the process by baking the clay models in the oven. Ceramic furnaces, essential for firing clay sculptures for durability and stability, are becoming increasingly popular in schools and art centers. If you know how to bake clay, you'll be able to make your sculptures, tableware and gifts last longer. Here at oneHOWTO we will show you how.
- A piece of dry clay
- A professional ceramic furnace
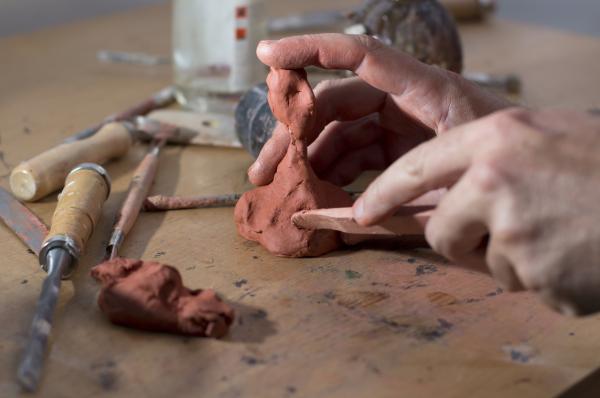
Knead the clay well before baking in order to remove any air bubbles that could burst in the oven. This is an important part of the process, as if there is any air within the clay, the shape you give it will not make a difference and it will easily break. Additionally, proper kneading ensures the clay is uniform and smooth, enhancing the final appearance of your artwork.

Make sure the piece of clay is not solid, and, if it is hollow, make sure that it has an entrance for air to pass through or it might explode in the oven. Make sure to have shaped your clay in your desired outcome of design, e.g. this face made out of clay. It's also beneficial to create uniform wall thickness, especially in hollow pieces, to ensure even drying and firing.

Before cooking the clay, make sure that it is completely dry. If your clay is not completely dry it will not cook correctly in the oven, so make sure that your piece of clay is correctly dry at room temperature first. Drying times can vary, so allow ample time depending on the thickness and size of your piece.

Note that after being in the oven clay loses moisture and notably shrinks, losing about 10% of its volume. If your clay sculpture has specific measurement requirements, make it a bit bigger to compensate for this shrinkage. It can be quite frustrating to realize that your clay is much smaller than you expected if you did not know this. Planning for shrinkage is essential when designing functional items like mugs or bowls.
Join a ceramics or clay-modelling class. In addition to teaching you and guiding you through the modelling process, these classes should also show you how to bake the clay. Although you have to invest a little money sometimes, this is the best way to learn if you are really interested in clay and clay-modelling (or even craft making) as a whole. Classes often provide access to professional-grade tools and materials, which can enhance your learning experience.

If you prefer to go at it alone, get access to a professional kiln. You can easily get access to one in workshops or pottery shops, where they'll charge you around twenty dollars/pounds or so to use their oven, depending on the size of the clay model. The most common way of doing so is to make a batch and cook several pieces. Economically it can sometimes be more expensive than just joining a class, however it can be more rewarding at the end as you have learned to do something by your own. Using a kiln also allows for more precise temperature control, crucial for certain clay types.
Do not try to cook it in the oven at home. You'll need special clay to do this, sold in craft shops. Apart from not being very hygienic, you run the risk of ruining your oven as clay is very hard to get rid of and is quite messy, therefore avoid at all costs doing this in your own home. Furthermore, home ovens cannot reach the high temperatures required for proper clay firing, potentially compromising the integrity of your creation.

If your piece is of colossal dimensions and the oven is small, you have to bake the sculpture in sections and assemble them afterwards. If you do not want to take the sculpture apart, contact a company that owns an industrial furnace. You could find one in any large town or city. When assembling large pieces, use strong adhesives or clay slip to ensure a seamless finish.
The firing temperature varies depending on the type of clay. The most common clay used in ceramics, composed of different types of hydrated aluminum silicates, is fired at a temperature of between 900ºC and 1000ºC. If, however, you use refractory clay, stoneware or porcelain, the firing temperature increases and is between 1250°C and 1300°C. Make sure to have the oven at the correct temperature or the clay will lose its properties and not look on top form. Knowing your clay type is vital, as incorrect temperatures can result in cracks or other defects.

You can safely and securely bake clay for over eight hours. Professionals responsible for doing this will ensure that, once the oven is turned off, the piece returns to cool gradually to avoid extreme temperature changes that could ruin the sculpture. Slow cooling helps prevent thermal shock, which can lead to cracks or even breakage, ensuring the longevity of your work.
If you want to read similar articles to How To Bake Clay in the Oven, we recommend you visit our Crafts & leisure category.
- Ceramics can be painted before or after cooking. You can decorate your room in advance with different types of paints. Cooking temperatures will be similar for ceramics. Additionally, using underglazes or glazes can enhance the visual appeal and provide a glossy finish to your ceramic pieces.